|
Delivery Note
|   |
|
Delivery Note
| |
Delivery Note / Invoice Tutorial
From the main menu select Deliveries. You will be presented with a screen similar to the following:
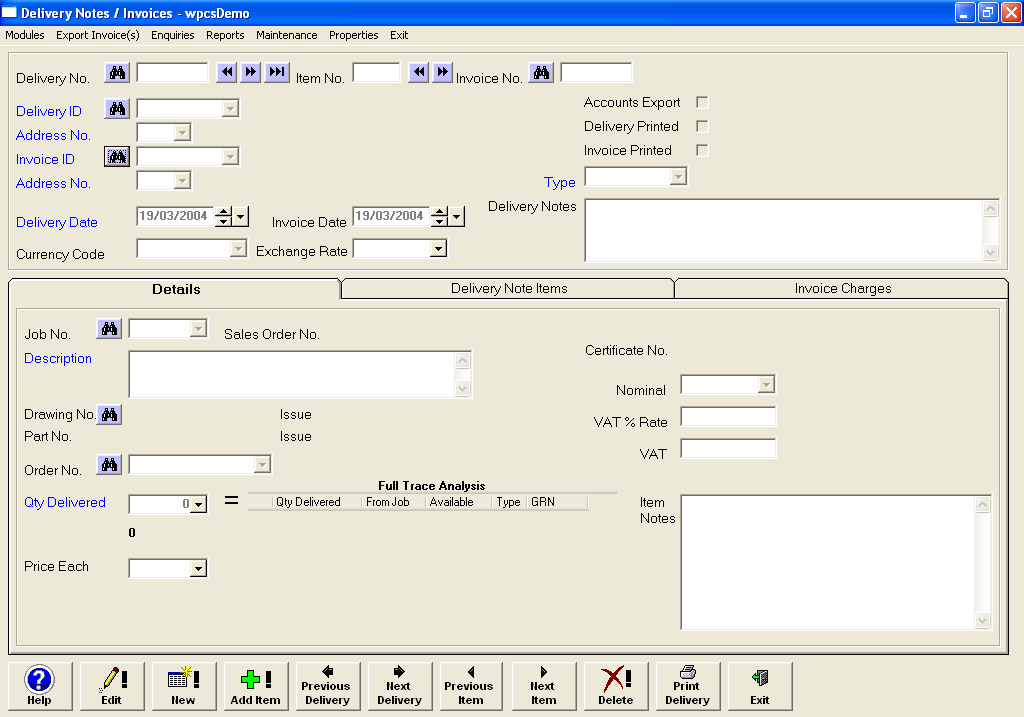
The deliveries module handles the documentation and traceability of goods despatched to a customer and produces an invoice which can then be exported to a compatible accounts system such as Sage.
To create a delivery note for our job, select ![]() from the bottom menu. The screen will clear and the cursor will appear in the job no field. We can produce two types of delivery note at this point, one which is linked to a specific job or free format. For the latter we simply bypass the job no field, type a description, enter a quantity followed by a price and lastly a customer id. For example we could use the free format option to add a delivery charge to an existing item or a one off tooling charge.
from the bottom menu. The screen will clear and the cursor will appear in the job no field. We can produce two types of delivery note at this point, one which is linked to a specific job or free format. For the latter we simply bypass the job no field, type a description, enter a quantity followed by a price and lastly a customer id. For example we could use the free format option to add a delivery charge to an existing item or a one off tooling charge.
For out tutorial enter the job no of our newly created job. The automatic dropdown search will appear as you type.

Press enter when you have located the correct one.
Next we are presented with the quantity field. This is the quantity we are going to despatch to the customer. The total available for delivery is shown below. Depending on how the system is set up, will determine if you can exceed this figure. In normal circumstances then over deliveries will not be allowed unless authorisation is given. In the quantity field enter half of the figure available. The system will cater for as many part deliveries as you require. Press you enter key.
The next section deals with the traceability of the item. The quantity that is being delivered may have come from various sources. For example, although the order was for say 100, we may have only made 50 and taken the remaining 50 from finished stock. The finished stock items may have been made several months ago under a different job. So we immediately have 2 sources from where these items have been made. For full traceability, it is important to make sure we are despatching the correct items and they are labelled accordingly. If traceability is not an issue then we simply enter the same figure here as we entered in the quantity field.
The full trace table displays a full list of all possible sources of what is being delivered. These sources would have been entered in the jobs module.
![]()
For our tutorial though you will see that the from job column has the same job number as what we have just entered. In other words the items we are delivering were made under this job. The type column is a J which means it is a job. If it was F for instance then it would denote stock.
The quantity delivered field must equal the total of the quantity delivered column in the trace grid otherwise the system will not allow you to save this delivery note.
Select the Save menu button to create the delivery note. A message will appear telling us that a certificate of conformity has been generated due to the fact that we ticked the certificate box when we entered the job onto the system.

The new certificate number is shown on the right hand side of the screen. The next available delivery number will be shown at the top of the screen.
Let us now add a delivery charge. Select the ![]() button. Leave the job number empty and click into the description field. Type Delivery Charge and then click the quantity field. Type a 1 here and enter a price of 25 in the price field.
button. Leave the job number empty and click into the description field. Type Delivery Charge and then click the quantity field. Type a 1 here and enter a price of 25 in the price field.
Select the ![]() button. A delivery charge item has been added to the delivery note. We can add charges like this at any point before the Invoice is printed.
button. A delivery charge item has been added to the delivery note. We can add charges like this at any point before the Invoice is printed.
The delivery note now has 2 items as shown at the top of the screen in the item field. To look at the previous item on the delivery note select the ![]() button on the bottom of the screen or the left set of arrow buttons next to the item no field.
button on the bottom of the screen or the left set of arrow buttons next to the item no field. ![]()
To view all the items on a delivery note select the Delivery Note Items tab. This will display a full list. To view a specific item, select it with the mouse and then select the Details tab. This will display the full details.
Let us now print our delivery note. Select the ![]() button from the bottom menu. Leave the delivery number ranges as they are because we only want to print one delivery note and select the Preview button. A copy of the delivery note is displayed in the preview window. Select
button from the bottom menu. Leave the delivery number ranges as they are because we only want to print one delivery note and select the Preview button. A copy of the delivery note is displayed in the preview window. Select ![]() when you have finished.
when you have finished.
At this point it would be prudent to print our certificate of conformity. Rather than close the delivery window, select the Main Menu icon on your task bar and then select Certificates from the main menu.
![]()
Next - Certificate of Conformity