https://redantsoftware.co.uk/Downloads/OutlookCalendarSetup.pdf
To use the shared calendar functions, you will need a desktop copy of Outlook 2016 or above and either an Office 365 basic email account. We do not support Outlook which is using other third-party email systems such as Google Mail/Calendars.
If you already have a ‘shared’ outlook calendar available in your Outlook then you can skip these steps and go to the section ‘Redant Calendar Setup’.
If you are the only Redant user and the system is run from a single computer then you can use your own Outlook Calendar. The reference for the calendar link will be the email address (see later) of the calendar. If however, there are other Redant users on other computers then you must setup shared calendars as shown in this document or use a free outlook.com email account.
Redant will not work with ‘Public’ calendars. How do I know if I have a public or shared calendar?
In Outlook select your calendar view as follows:
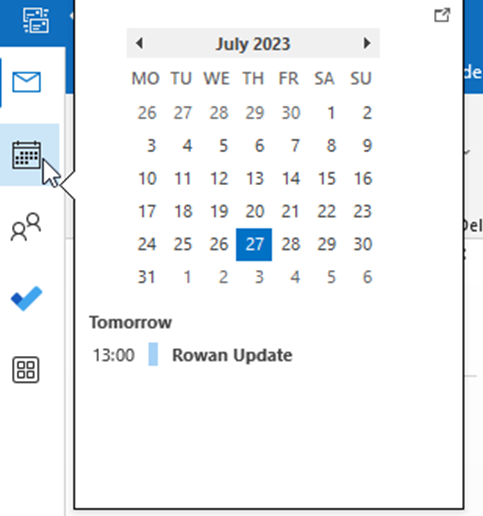
Under ‘My calendars’ on the left-hand side you will see a list of the available shared calendars – a shared calendar will have an email address associated with it. Public calendars are shown under ‘Other’ Calendars and ‘do not’ have an email address. Make a note of the email addresses of the shared calendars you want to use for Redant alternatively see below on how to create shared mailbox calendars.
Redant can interact with three different calendars at present. These are for employee holidays, production and user. You can use one calendar for all three but be aware it will become crowded with a lot of entries.
The holiday calendar is used by the new redant holiday module (available for purchase) which works within the shop floor data collection system. This allows employees to provisionally book holidays and notify staff of their intention via email. All the appropriate company policies such as correct notice given and maximum allowed on holiday within their group are checked prior to the employee requesting a holiday saving time and money. A member of staff can then authorise the holiday which is then added to the appropriate holiday calendar for all to view. The employee is always aware of what has been provisioned and accepted using a shop floor terminal.
The production calendar records the due date of a job and keeps track of delivery date changes made in redant. A production manager can then visually see what jobs are due per day, week or month via the calendar. If this calendar was combined with the Holiday calendar, then it becomes a very powerful visual tool showing jobs due and who is on holiday.
The user calendar would normally be the user’s own local calendar but could be a sales@yourcompany.co.uk calendar as an example. Presently it will receive quote follow-up reminders, but in the future may contain other entries.
Every redant user who interacts with these calendars must have them available in their outlook otherwise entries will not be shown and they will not be able to make them either. They will also receive an error message which will be annoying. See later under the 365 shared mailbox setup section ’Add Shared Mailbox Members’ to give users access to a shared mailbox and how to setup Outlook
Redant Shared Mailbox Setup
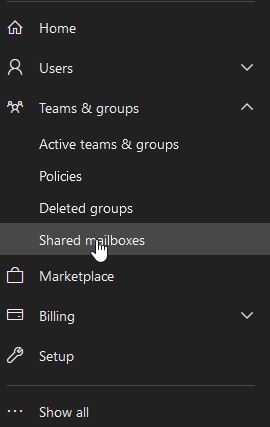
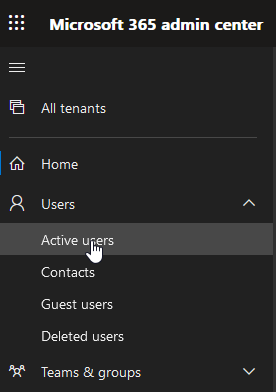
Login to your Office 365 account and select ‘Admin’ from the left Menu

If this option is not available then you will need to sign in to 365 with an Admin user or get your account upgraded to allow Admin rights.
Expand ‘Teams & Groups and select ‘Shared Mailboxes’
You will see a window similar to the following showing any shared mailboxes already setup. If the mailbox is listed then see the section below to allow which users can access the mailboxes.

Select 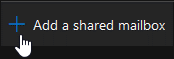 to add a new mailbox
Enter the mailbox details. Example below
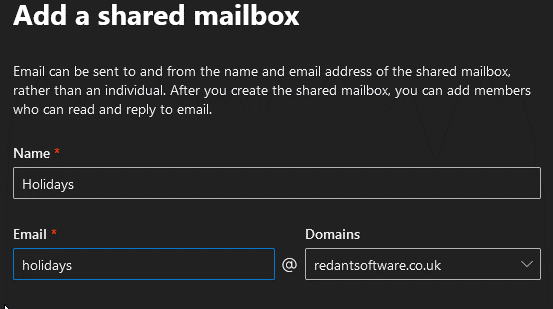
Select Save Changes to create the mailbox.
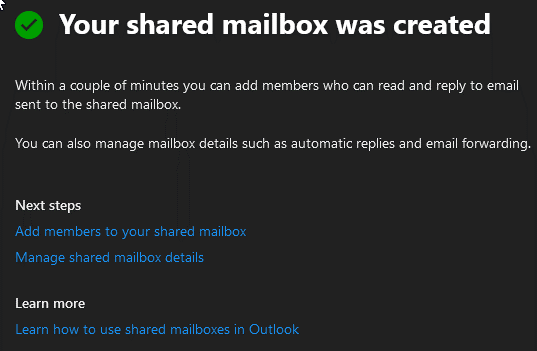
Select ‘Add Members’ to add existing 365 users to this mailbox
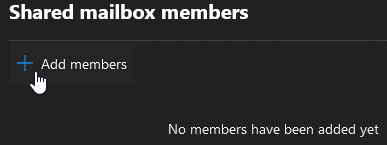
Select the ‘+ Add Members’ button
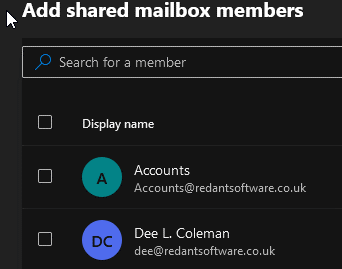
Check each user you want to have access to this mailbox followed by the ‘Add’ button
Close the shared mailbox entry and navigate to the following from the left pane:
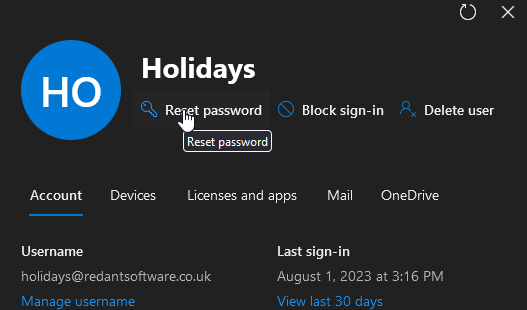
Here you will see a list of all mailboxes including the new one you have created. Select the new mailbox to open its properties.
![]()
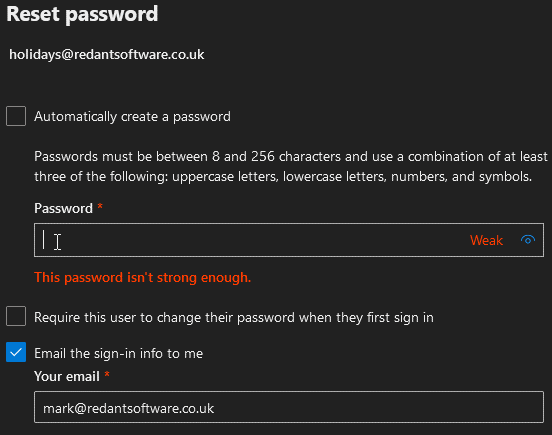
Select Reset Password:
Enter a new password for the mailbox and save:
You now need to add this new shared mailbox to each desktop Outlook system who will be using the functionality in Redant.
Adding an Email Account / Calendar to Outlook Desktop
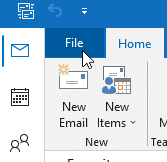
Open up the users Outlook and select File from the top menu:
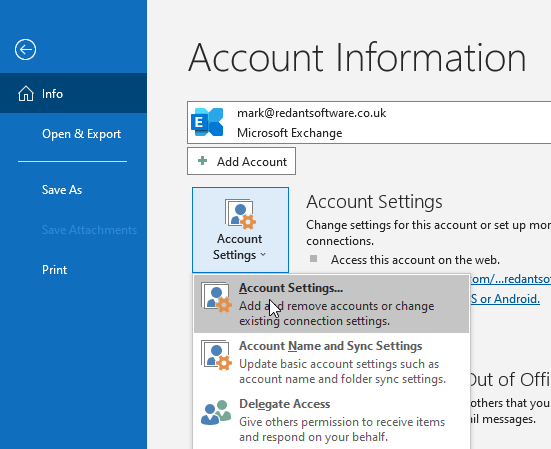
Select Account Settings and then Account Settings again as shown below:
From the following window select New to create a new entry under the Email Tab. If however the shared mailbox is already listed then you can skip this section.
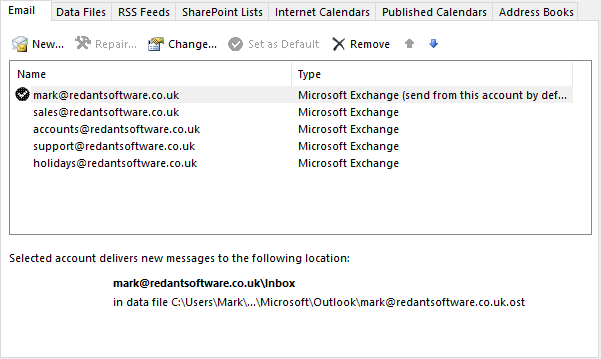
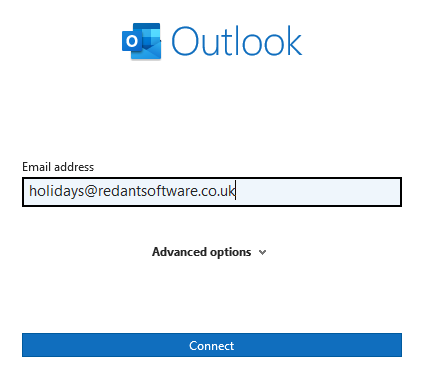
Enter the email address of your shared mailbox you created earlier followed by connect. Enter the mail box password and continue. Wait for the message ‘Account Successfully Created’ to appear. Close Outlook, wait 10 seconds and then start it again. Navigate to the File > Account Settings > Account Settings and the new mailbox entry should now be visible. You can add more than one before closing outlook.
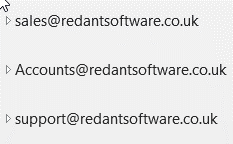
The newly added mailbox will be shown in the Outlook left pane below the inbox of the main user similar to below:
Outlook shared mailboxes can be used for email, tasks, calendar entries etc. Any new item added or changed is shown to every user who has this mailbox installed. This is a good way of adding email mailboxes to Office 365 without paying for a license. The proviso is that you must have at least one paid mailbox in outlook but you can have as many shared mailboxes under that.
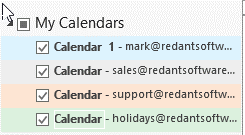
Select the Outlook Calendars from the top of the left pane:
![]()
Under My Calendars select the ones you want to display
When Redant makes changes using anyone of the integrated calendars then the changes will be shown in the relevant calendars immediately.
Redant Calendar Setup
There are three calendar entries that have to be made in Redant to enable them to interact with the outlook shared calendars. As mentioned previously, all three-calendar links can point to the same Outlook calendar but be aware of how busy the calendar will be.
You do not need to setup all three calendar. Only setup the ones you require and make sure the Outlook users have the appropriate calendar(s) available.
The first calendar link we shall setup is the User Calendar. This calendar will record entries to remind a Redant user to follow up new quotations, normally after 7 days.
Login to Redant as Admin from the user’s computer and then from the main menu select Maintenance>Users>login ID N.B. you must login from the user’s computer to perform the test below so you are working with their Outlook.
For each user who requires Redant to create calendar entries on their own personal calendar, enter the details for the ‘Outlook Calendar (Email) field as shown below. This will be the email address of the calendar. If this is their own then it will be their email address or if it’s a shared calendar then the email address of the shared calendar. Once you have entered this then select the ‘Test Calendar’ button to make sure a test entry has been made to the appropriate outlook calendar. Select ‘Save’ to record your changes. If an error appears then either you have spelt the calendar email incorrectly OR the user does not have access to the calendar in question. See earlier in this document to see what shared calendars the user has access to in Outlook

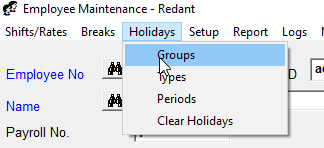
The second Outlook calendar is for employee holiday entries. From the main menu select Modules>Maintenance>Employee
From the top menu select Holidays>Groups as shown
See the section ‘Holiday Groups Setup’ in the Holiday Bookings document (available separately) on how to setup the holiday groups.
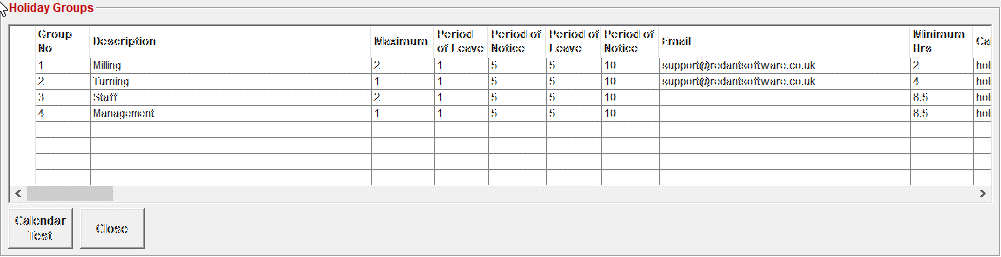
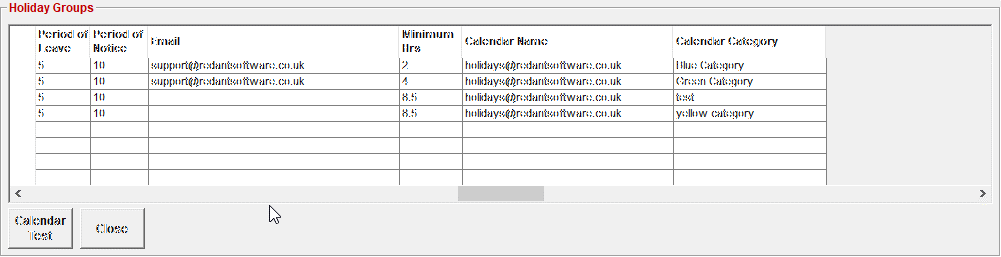
Each group can have a different holiday calendar along with its own ‘Calendar Category’. Scroll the group grid to the right and enter the email address of the calendar required for each group. Use the ‘Calendar Test’ button to verify the calendar is working correctly for each group entry. The Category names must be entered exactly the same as in the outlook calendar e.g., ‘Green Category’ etc.
When selecting the ‘Calendar Test’ button an entry should appear in the shared Holiday calendar in Outlook. See previously for an explanation of any errors and again make sure you are at the User’s computer when performing the test. Each calendar test must be done for each redant user from their computer.
The final calendar to setup is for the Production Calendar. This calendar will record the due date of all jobs entered including any changes made while the job is live. Completed jobs are automatically removed from the calendar and any delivery date changes made in Redant are also reflected in the calendar.
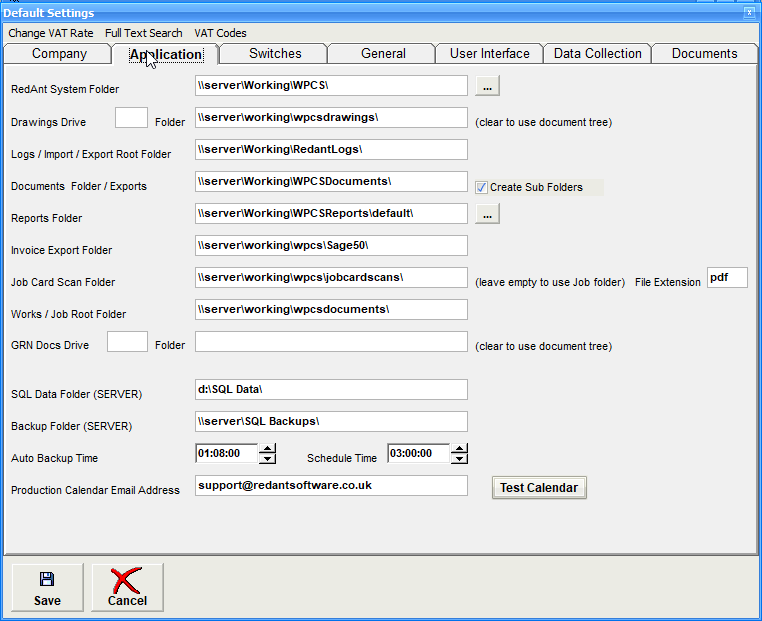
From the main menu select Maintenance>Setup>Defaults then select the ‘Application’ tab. Enter the Production calendar email address under the ‘Production Calendar Email Address’ field followed by the ‘Test’ button. (See previous regarding any errors and corrections). Check to see if a test entry has been made to the calendar in Outlook. Select Save to continue. Make sure all Redant users restart their programs to ensure the changes take effect.
You have now successfully setup redant to work with Outlook calendars. Make sure all users restart their redant systems to apply the changes.
If you are not using any of the calendar functions e.g., Holidays then there is no need to enter an email address for that calendar. Redant will ignore any calendar links that are empty and no interaction will take place.